
Place lead tape at 12, 3 and 9, throat, or handle to tune balance.
If you want more pop, a steadier sweet spot, or a softer feel, learning where to put lead tape on pickleball paddle is the fastest, cheapest upgrade you can make. I’ve tuned dozens of paddles for league players and coaches, and this guide breaks down what works, why it works, and exactly how to do it with confidence. Read on to master where to put lead tape on pickleball paddle and dial in your setup like a pro.

How lead tape changes your paddle
Lead tape changes three things: total weight, balance, and swingweight. Total weight is simple. Add grams, gain mass. Balance tells you where the weight sits. Swingweight is how heavy the paddle feels when you swing it.
Weight near the tip boosts power and plow-through. Weight near the handle keeps the paddle quick and whippy. A small change can be huge. Even 2 to 4 grams at the right spot can transform feel. When learning where to put lead tape on pickleball paddle, think less about numbers and more about the shot you want to improve.
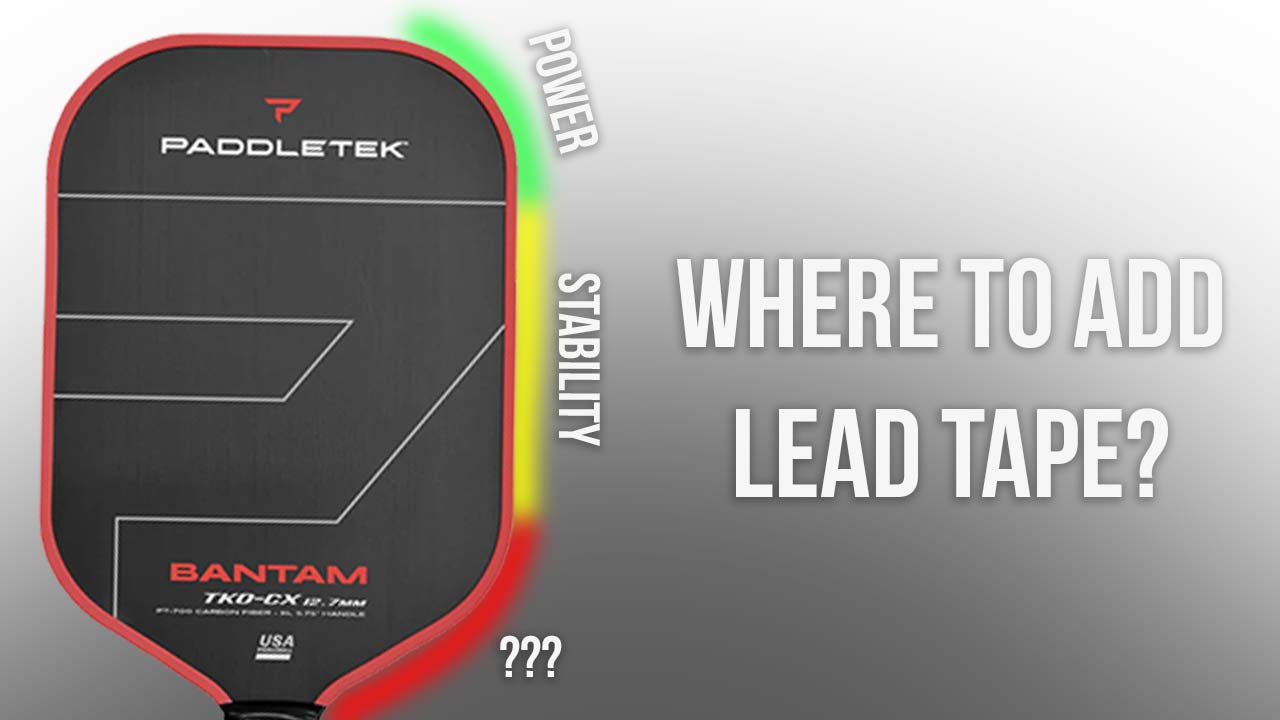
The best places to put lead tape and what each spot does
You have four main zones. Each zone changes the paddle in a unique way. Here is how to choose where to put lead tape on pickleball paddle for the result you want.
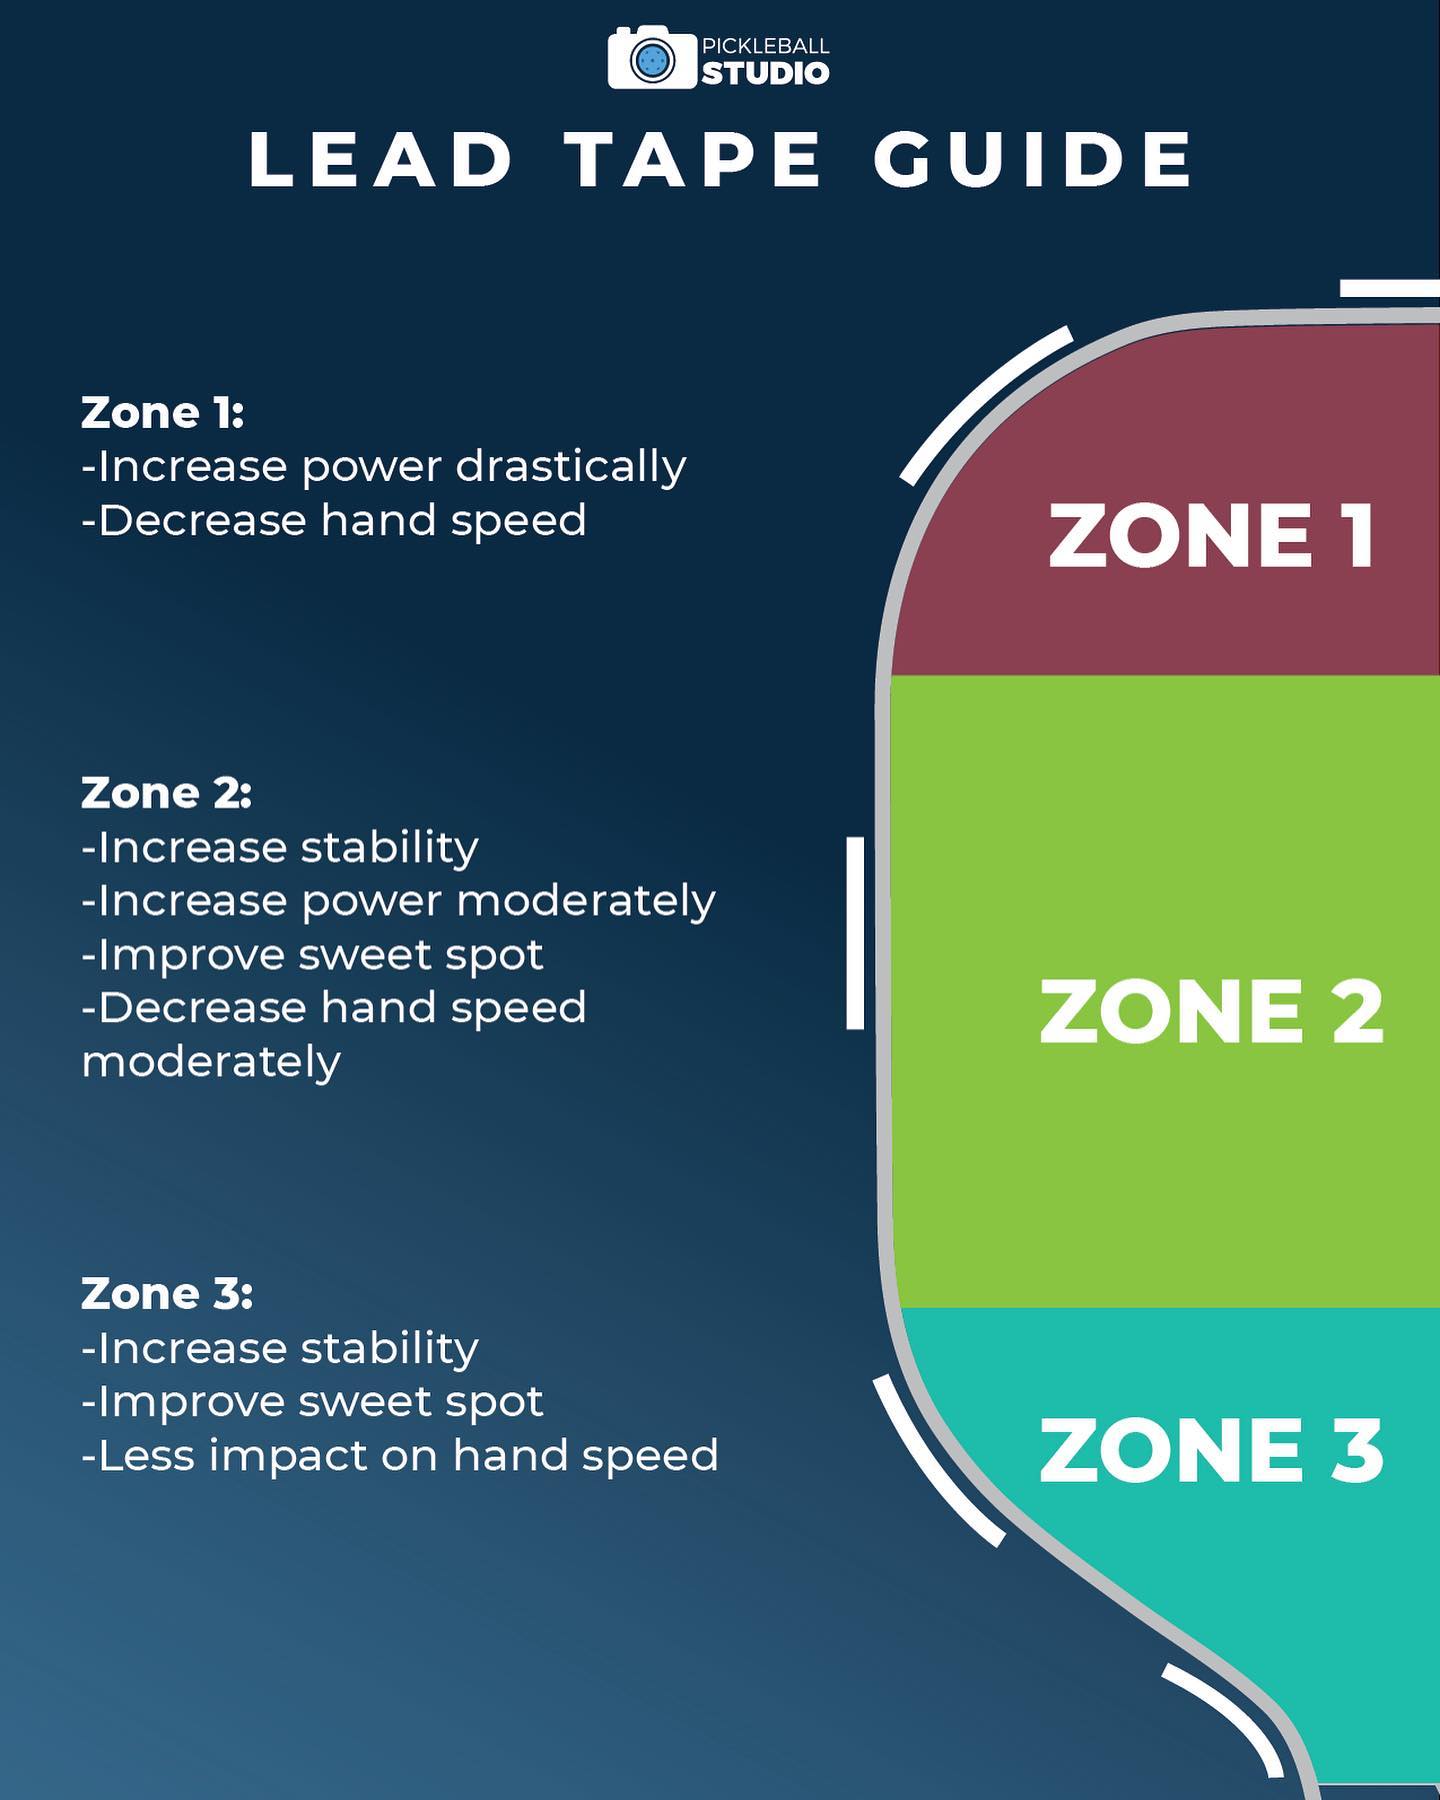
12 o’clock on the tip
This adds power, depth, and a heavier ball. It also raises swingweight the most.
- Best for: Players who want more pace on drives and put-aways.
- Trade-offs: Slower hand speed at the kitchen. Can feel top heavy if you add too much.
- Pro tip: Start with 2 strips of 2 inches each, stacked. Test, then add.
3 and 9 o’clock on the sides
This widens the sweet spot and improves stability. Mishits twist less.
- Best for: Blockers, counters, and anyone who shanks near the edges.
- Trade-offs: Slightly slower at the net if you overdo it.
- Pro tip: Mirror both sides. Keep the same length and grams left and right.
2 and 10 o’clock split
This gives a blend of tip power and side stability. It is a great middle ground.
- Best for: All-court players who want free power without losing control.
- Trade-offs: Adds moderate swingweight. Watch your hand speed.
- Pro tip: Use shorter strips here if you already have some at 3 and 9.
Throat or neck area
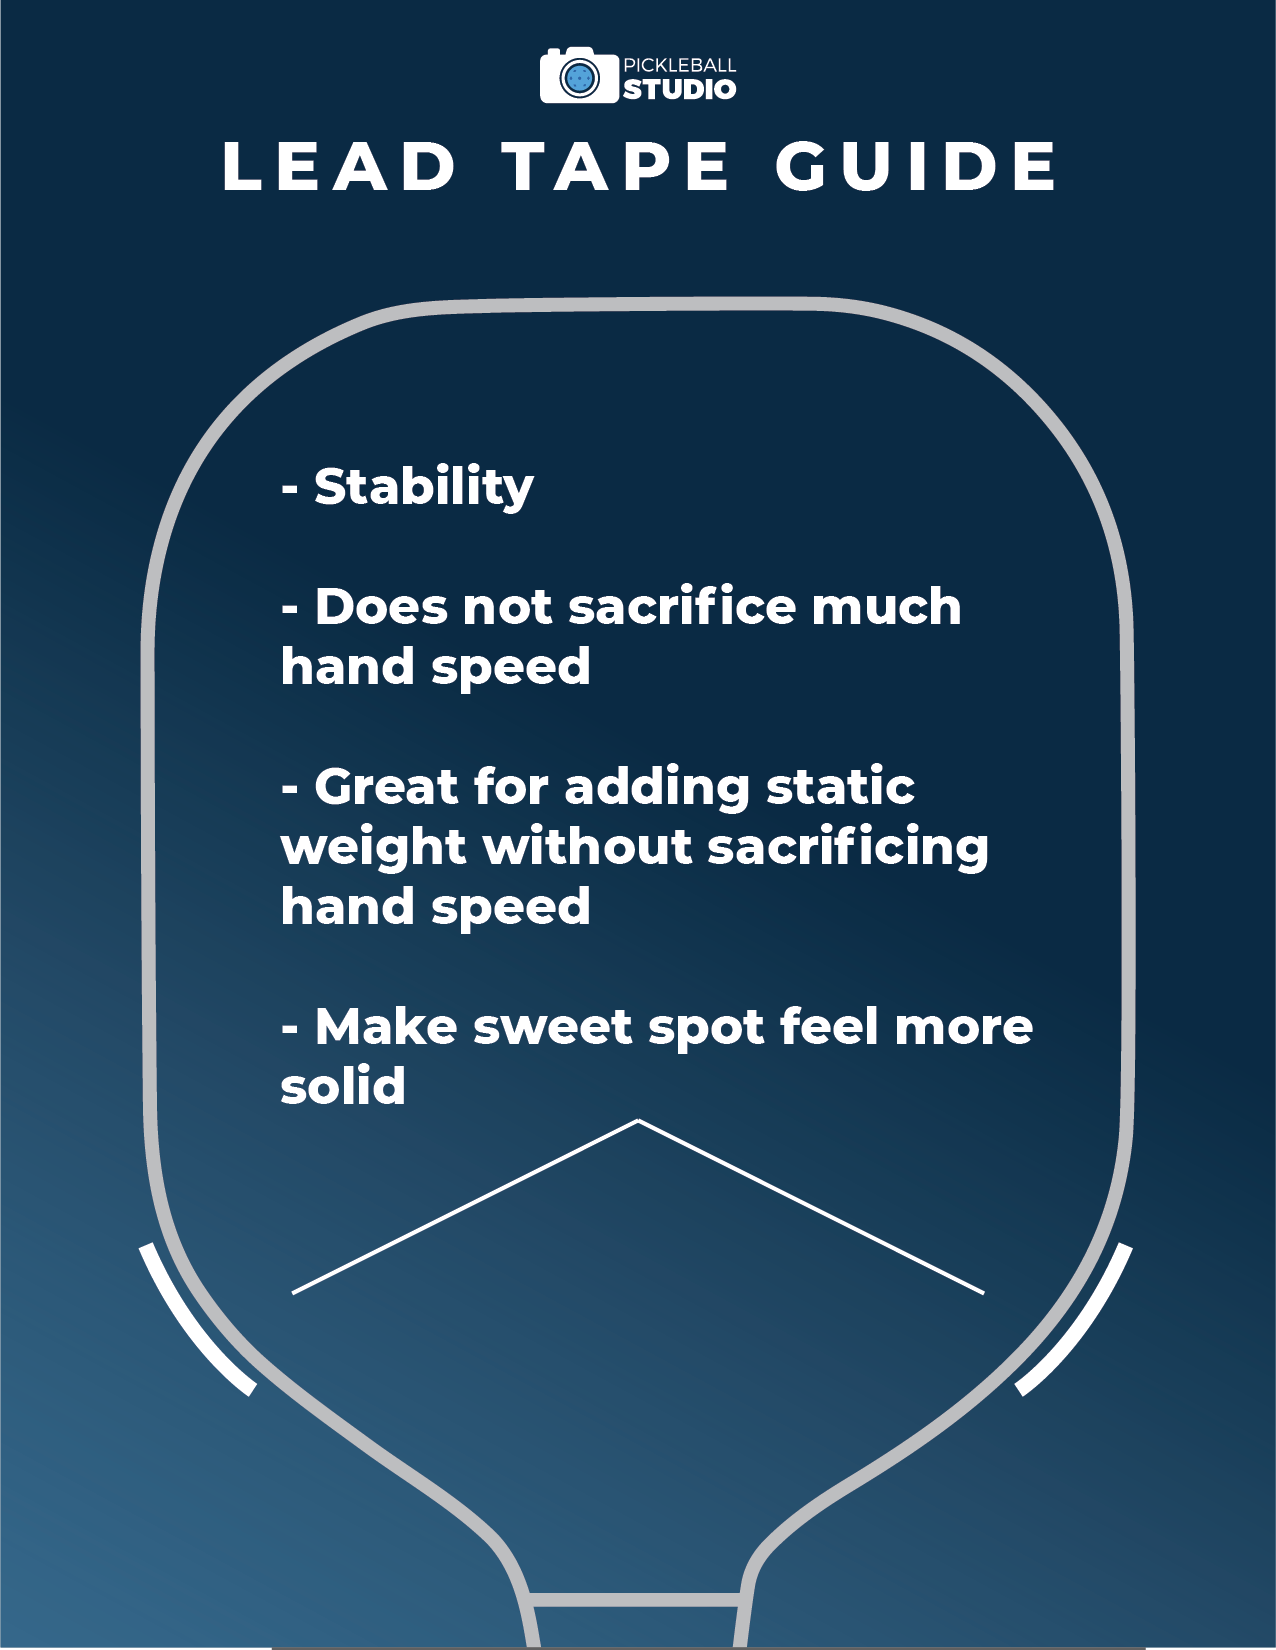
This adds stability with less swingweight than the tip. It can tame a lively face.
- Best for: Players who want a calmer, more solid feel in the mid-face.
- Trade-offs: Smaller boost in power than 12 o’clock.
- Pro tip: Keep tape inside the edge guard line for clean edges.
Under the grip or on the handle
This shifts balance back and makes the paddle faster in hand battles.
- Best for: Doubles players who live at the kitchen and love quick hands.
- Trade-offs: No extra power. It can feel lighter in the head.
- Pro tip: Use tungsten putty or narrow tape under the grip for clean installs.
Use this map as your guide for where to put lead tape on pickleball paddle. Start small, test, and build from there.

Step-by-step: how to apply lead tape safely
The process is simple. The best results come from clean prep and small, even changes.
- Gather tools: Scissors, isopropyl alcohol, microfiber cloth, lead or tungsten tape, edge guard tape, small scale.
- Clean the surface: Wipe with alcohol. Let it dry. This helps the tape stick.
- Measure and cut: Pre-cut equal strips for both sides when needed.
- Place and press: Apply tape with light tension. Press from center out to avoid bubbles.
- Seal the edges: Cover exposed tape with edge guard tape for durability and safety.
- Test on-court: Hit drives, dinks, blocks, and resets. Note feel and results.
- Adjust in grams: Add or remove 1 to 2 grams at a time. Keep it symmetrical.
If you are unsure where to put lead tape on pickleball paddle for your first try, pick 3 and 9 o’clock with short strips. It is the safest starting point.

Tuning by playing style
Match your lead plan to your game. Your hands and habits matter more than specs.
- Power baseliner: Add 2 to 6 grams at 12. Mix in 2 and 10 if you want stability.
- Fast hands at the kitchen: Add 2 to 6 grams under the grip. Keep the head light.
- Control and resets: Add 2 to 4 grams at 3 and 9. Calm the face and reduce twist.
- Spin chaser: Use 12 plus 2 and 10. The tip mass helps drive through the ball.
- Touch player: A gram or two at the throat for a softer, more stable feel.
As you learn where to put lead tape on pickleball paddle for your style, keep notes. Track grams, spots, and how it felt in matches.
How much weight to add and what it does
Small changes go a long way. On most paddles:
- 1 gram at 12 o’clock gives a clear bump in depth and swingweight.
- 2 to 4 grams total at 3 and 9 makes mishits far less punishing.
- 4 to 8 grams under the grip can shift balance back without adding swingweight.
Use a simple plan:
- If drives land short: Add 2 grams at 12. Retest. Add 1 to 2 more as needed.
- If the paddle twists: Add 2 grams total at 3 and 9. Retest. Add another 2 grams if needed.
- If hand speed is slow: Move some mass from the tip down to the handle.
There is no single perfect number for where to put lead tape on pickleball paddle. Your arm speed, paddle length, and head shape change the result. Start light and listen to your hands.

Testing protocol and fine-tuning
Good testing makes tuning easy. Use short sets so you feel each change.
- Warm-up: Dinks, blocks, and third-shot drops to feel face control.
- Drives: Ten forehand and ten backhand from mid-court. Note depth and timing.
- Hands battles: Rapid volleys at the kitchen. Check if the paddle lags.
- Resets: Catch hot balls from the baseline. Judge stability and touch.
If a change helps one skill but hurts another, split the difference. That is the art of where to put lead tape on pickleball paddle.

Rules, safety, and warranty notes
Lead tape is legal on most approved paddles. You cannot alter the hitting surface texture or use reflective or sharp materials. Check your paddle maker’s site for warranty terms, since some brands limit mods.
Handle lead with care. Wash your hands after use. Cover tape with edge guard tape to avoid contact. Store extra tape away from kids and pets. These small steps keep where to put lead tape on pickleball paddle both safe and smart.
Common mistakes to avoid
Many players add too much too fast. That kills feel. Avoid these traps.
- Overloading the tip: Power goes up, but hands slow down at the net.
- Asymmetry: Uneven left-right tape makes the paddle twist and aim off target.
- Skipping cleanup: Oils and dust make tape peel off during play.
- Ignoring grip size: Adding under-grip mass can make the handle too thick.
- No play test: You cannot judge a setup by swings alone. Hit real shots.
A careful plan for where to put lead tape on pickleball paddle saves time and money.

Maintenance and seasonal adjustments
Heat, cold, and humidity change how tape sticks and how your paddle swings.
- Check edges weekly: Press down any lifted corners. Replace worn strips.
- Summer setup: You may prefer less swingweight for faster hands in heat.
- Winter setup: A bit more tip mass can help the ball carry in cold air.
Keep a small kit in your bag. When you know where to put lead tape on pickleball paddle, five minutes is all it takes to refresh your feel.
Real on-court examples
Here are simple cases from players I have helped.
- Power seeker: We added 3 grams at 12 and 2 grams total at 3 and 9. His drives gained depth, and blocks felt firm.
- Kitchen ninja: We moved 4 grams from 12 to under the grip. Her hands sped up, and counters improved at once.
- Touch artist: We put 2 grams at the throat and 2 at 3 and 9. Resets felt softer, and mishits stayed in.
These stories show how where to put lead tape on pickleball paddle depends on your goals, not just specs.
Frequently Asked Questions of where to put lead tape on pickleball paddle
Is lead tape legal in pickleball tournaments?
Yes, lead tape is allowed on most approved paddles. Do not change the hitting surface texture, and follow event rules on alterations.
How many grams should I start with?
Start with 2 to 4 grams. Place it at 3 and 9 for stability or at 12 for power, then test and adjust.
Will lead tape damage my paddle?
No, if applied to clean surfaces and covered with edge guard tape. Remove slowly and clean residue with alcohol.
Can I use tungsten tape instead of lead?
Yes, tungsten tape works and is denser, so you need less length. It is also a good choice if you want to avoid lead.
Where should beginners put lead tape first?
Start at 3 and 9 o’clock with small, equal strips. It steadies the paddle without making it feel too heavy.
How do I keep the paddle fast but still add power?
Add a little at 12 and some under the grip. This combo gives pop without killing hand speed.
What if my backhand feels weaker than my forehand?
Try a tiny, mirrored boost at 3 and 9, not just one side. Asymmetry can cause aim issues and odd contact.
Conclusion
Lead tape lets you shape power, control, and speed in minutes. Use the zone map, add small amounts, and test with purpose. When you learn where to put lead tape on pickleball paddle for your style, you unlock a custom feel without buying a new stick.
Grab a roll, start with 2 to 4 grams, and take notes on court. If this guide helped, share it with your doubles partner, subscribe for more gear tips, or leave a comment with your current setup and goals.